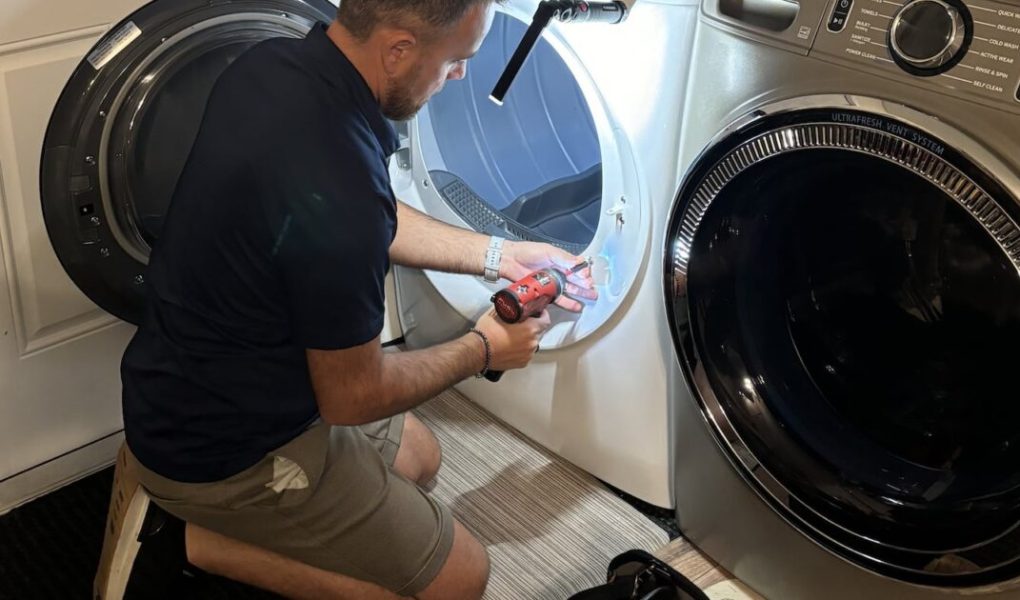
A dryer that won’t start can bring your laundry routine to a grinding halt, leaving you with damp clothes and a growing pile of laundry. While the issue might seem daunting, many common causes of a dryer failing to start can be fixed with basic troubleshooting and DIY repairs. At Tech-Angels Appliances, we’re here to help you get your dryer back up and running without the immediate need for a costly service call. In this comprehensive guide, we’ll walk you through the step-by-step process of diagnosing and fixing a dryer that won’t start, covering everything from simple checks to more technical appliance repair. Whether you’re dealing with an electric or gas dryer, these DIY tips will empower you to tackle the problem confidently. Let’s get started and restore your dryer to full functionality!
Understanding Why a Dryer Won’t Start
A dryer requires several components to start a cycle: power, a functioning door switch, a start button, a motor, and various safety mechanisms like thermal fuses. When one of these fails, the dryer won’t start. Before diving into repairs, let’s explore the most common reasons for this issue.
Common Causes of a Dryer That Won’t Start
-
Power Supply Issues: The dryer may not be getting electricity due to a tripped breaker, blown fuse, or damaged cord.
-
Faulty Door Switch: The door switch ensures the dryer only runs when the door is closed. If it’s broken, the dryer won’t start.
-
Broken Start Switch: A defective start button or switch can prevent the dryer from initiating a cycle.
-
Blown Thermal Fuse: The thermal fuse protects the dryer from overheating. If it blows, the dryer won’t start.
-
Faulty Timer or Control Board: The timer (in older models) or control board (in newer models) regulates the dryer’s cycles. If it’s malfunctioning, the dryer won’t start.
-
Motor Issues: A burnt-out or jammed motor can prevent the dryer from starting.
-
Belt or Drum Problems: A broken belt or seized drum can stop the dryer from operating.
Preparing for the Repair: Safety and Tools
Fixing a dryer involves working with electrical components, so safety is a top priority. Here’s how to prepare for a safe and effective repair.
Step 1: Gather Your Tools and Materials
You’ll need the following:
-
Screwdriver (Phillips or flathead, depending on your dryer)
-
Multimeter (to test electrical components)
-
Replacement parts (e.g., thermal fuse, door switch, start switch—specific to your model)
-
Work gloves (to protect your hands)
-
Flashlight (for better visibility)
-
Vacuum or brush (to clean lint)
Step 2: Order Replacement Parts (If Needed)
If you identify a faulty component, you’ll need a replacement. Check your dryer’s manual for the model number and order compatible parts from an appliance store or online. If you don’t have the manual, look for the model number on a label inside the door or on the back of the dryer.
Step 3: Safety Precautions
-
Unplug the Dryer: Disconnect the dryer from the power outlet to avoid electrical shock. If it’s hardwired, turn off the power at the circuit breaker.
-
Turn Off Gas (For Gas Dryers): If you have a gas dryer, shut off the gas supply valve to prevent leaks.
-
Work in a Dry Area: Ensure the area around the dryer is dry to avoid electrical hazards. For more safety tips, see our guide on the basics of appliance electrical safety.
Step 4: Move the Dryer
Pull the dryer away from the wall to access the back and front panels. Place a towel or mat under the dryer to protect the floor.
Step-by-Step Guide to Fixing a Dryer That Won’t Start
Let’s walk through the troubleshooting process, starting with the simplest fixes and moving to more technical repairs.
Step 1: Check the Power Supply
A lack of power is one of the most common reasons a dryer won’t start.
Verify Electrical Power
-
Check the Plug: Ensure the dryer is plugged in securely. For electric dryers, this is typically a 240V plug; for gas dryers, it’s a 120V plug.
-
Inspect the Breaker: Check your home’s circuit breaker panel for a tripped breaker. Reset it if necessary. If it trips again, there may be an electrical issue—call an electrician.
-
Test the Outlet: Use a multimeter to test the outlet for voltage (240V for electric dryers, 120V for gas dryers). If there’s no power, the outlet may be faulty.
-
Look for a Blown Fuse: Some dryers have an internal fuse in the power cord or near the control panel. Check your manual to locate it and test it with a multimeter for continuity. Replace it if there’s no continuity.
Inspect the Power Cord
-
Check for Damage: Look for frayed wires, burns, or cuts on the power cord. If damaged, replace the cord immediately—don’t attempt to repair it with tape, as this is a safety hazard.
-
Ensure a Secure Connection: If the cord connects to a terminal block (in hardwired models), ensure the connections are tight and free of corrosion.
Step 2: Test the Door Switch
The door switch is a safety feature that prevents the dryer from starting if the door is open.
How to Test the Door Switch
-
Locate the Switch: The door switch is usually near the door frame, often a small button or lever that’s pressed when the door closes.
-
Listen for a Click: Open and close the door—most switches make a clicking sound when engaged. If you don’t hear a click, the switch may be faulty.
-
Test with a Multimeter:
-
Unplug the dryer for safety.
-
Remove the top or front panel to access the switch (consult your manual—usually involves removing screws at the back or under the control panel).
-
Disconnect the wires from the switch (take a photo for reference).
-
Set your multimeter to the continuity setting.
-
Press the switch button and touch the probes to the terminals. A working switch will show continuity when pressed and no continuity when released.
-
-
Replace the Switch: If the switch is faulty, order a replacement for your model. Remove the old switch (usually held by screws or clips), install the new one, and reconnect the wires.
Step 3: Check the Start Switch
A broken start switch or button can prevent the dryer from initiating a cycle.
How to Test the Start Switch
-
Press the Button: Try pressing the start button firmly. If it feels loose or doesn’t click, it may be stuck or broken.
-
Access the Switch:
-
Unplug the dryer.
-
Remove the control panel (usually by unscrewing it from the top or back—check your manual).
-
-
Test with a Multimeter:
-
Disconnect the wires from the start switch.
-
Set your multimeter to the continuity setting.
-
Press the start button and touch the probes to the terminals. A working switch will show continuity when pressed.
-
-
Replace the Switch: If there’s no continuity, order a replacement start switch. Remove the old switch (often held by screws or clips), install the new one, and reconnect the wires.
Step 4: Test the Thermal Fuse
The thermal fuse is a safety device that blows if the dryer overheats, cutting power to prevent a fire.
How to Test the Thermal Fuse
-
Locate the Fuse: The thermal fuse is typically on the blower housing or near the heating element (check your manual). For most dryers, you’ll need to remove the back panel (for rear-access models) or the front panel and drum (for front-access models).
-
Test with a Multimeter:
-
Unplug the dryer.
-
Disconnect the wires from the thermal fuse.
-
Set your multimeter to the continuity setting.
-
Touch the probes to the fuse’s terminals. A working fuse will show continuity; if there’s no continuity, the fuse is blown.
-
-
Replace the Fuse: Order a replacement thermal fuse for your model. Remove the old fuse (usually held by screws), install the new one, and reconnect the wires.
-
Investigate the Cause: A blown thermal fuse often indicates an overheating issue. Clean the dryer vent and exhaust duct to ensure proper airflow, as lint buildup is a common culprit.
Step 5: Inspect the Timer or Control Board
The timer (in older dryers) or control board (in newer models) regulates the dryer’s cycles. If it’s faulty, the dryer won’t start.
How to Test the Timer/Control Board
-
Access the Component:
-
Unplug the dryer.
-
Remove the control panel to access the timer or control board (usually held by screws at the top or back).
-
-
Look for Damage: Check for burnt spots, corrosion, or loose connections on the timer or control board.
-
Test with a Multimeter:
-
Disconnect the wires (take a photo for reference).
-
Test the timer or control board for continuity at the appropriate terminals (consult your manual for the correct terminals).
-
-
Replace if Necessary: If the timer or control board is faulty, order a replacement. This repair can be complex, so consider professional help if you’re unsure.
Step 6: Check the Motor
The motor powers the drum and blower. If it’s burnt out or jammed, the dryer won’t start.
How to Test the Motor
-
Access the Motor:
-
Unplug the dryer.
-
Remove the front or back panel and the drum (depending on your model—check your manual).
-
The motor is typically near the bottom, connected to the drum belt.
-
-
Check for Obstructions: Ensure the motor isn’t jammed by lint or debris. Manually turn the motor shaft to see if it moves freely.
-
Test with a Multimeter:
-
Disconnect the wires from the motor.
-
Test the motor windings for continuity (consult your manual for the correct terminals). No continuity indicates a burnt-out motor.
-
-
Replace the Motor: If the motor is faulty, order a replacement. This is a complex repair involving belt and drum removal, so professional assistance may be needed.
Step 7: Inspect the Belt and Drum
A broken belt or seized drum can prevent the dryer from starting, as the motor may sense resistance and shut down.
How to Check the Belt and Drum
-
Access the Drum:
-
Remove the front or top panel and the drum (check your manual for specific steps).
-
-
Inspect the Belt: Look for a broken or slipped belt. If broken, order a replacement and reinstall it by looping it around the drum and motor pulley.
-
Check the Drum: Manually spin the drum to ensure it moves freely. If it’s seized, the drum rollers or bearings may need lubrication or replacement.
Step 8: Test the Repair
-
Reassemble the Dryer: Replace all panels and screws, ensuring no wires are pinched.
-
Turn On Power/Gas: Plug the dryer back in or turn on the breaker, and open the gas valve if applicable.
-
Run a Test Cycle: Start the dryer with a small load (e.g., a few towels). Check if it starts, runs smoothly, and heats properly (if it doesn’t heat, see how to replace a dryer heating element).
Post-Repair Maintenance Tips
To prevent future issues with your dryer, follow these maintenance practices:
-
Clean the Lint Trap: Remove lint after every load to improve airflow and reduce overheating risks.
-
Clean the Vent: Vacuum the vent duct every 6 months to prevent lint buildup, which can cause thermal fuse failures.
-
Avoid Overloading: Follow the manufacturer’s load capacity guidelines to reduce strain on the motor and belt.
-
Schedule Regular Checkups: Annual inspections can catch potential issues early. For more tips, see the importance of regular appliance maintenance.
When to Call a Professional
While many dryer issues can be fixed at home, some situations require expert help:
-
Complex Electrical Repairs: If the problem involves the control board, motor, or wiring, a professional can handle it safely.
-
Gas Dryer Issues: Gas dryers involve additional safety risks—leave gas-related repairs to professionals.
-
Persistent Problems: If the dryer still won’t start after troubleshooting,
-
an underlying issue may require advanced diagnostics.
At Tech-Angels Appliances, our certified technicians specialize in dryer repairs. We can diagnose and fix any issue, ensuring your appliance operates safely and efficiently. Visit our contact page to schedule a service.
Why Choose Tech-Angels Appliances?
At Tech-Angels Appliances, we’re dedicated to helping Tech-Angels residents keep their appliances in top condition. Our team offers fast, reliable repair services for all major dryer brands, ensuring your laundry routine stays on track. Explore our blog or contact us today to book a service for more appliance repair tips.
Conclusion
A dryer that won’t start can be a major inconvenience, but with the right DIY approach, you can often fix the problem yourself. You can pinpoint the issue and apply the appropriate repair by checking the power supply, door switch, start switch, thermal fuse, timer/control board, motor, and belt. Regular maintenance and timely fixes are key to preventing future breakdowns. If you encounter a challenge you can’t solve, the team at Tech-Angels Appliances is here to help with expert dryer repair services. Get your dryer running again and keep your laundry routine on track—tackle the repair today!


